Goods Received
-
To start with, the System Administrator needs to give users permission to receive goods. This can be done under User Maintenance> User Register.
Users can access this module if the following permissions are given:
a. If a user with the user type “Others” has the checkbox for “Allow GR” checked as shown below:Screen: I[A] 
b. If a user with the user type “Requestor” has the checkbox for “Allow GR” checked as shown below:
Screen: I[B] 
c. Users with user type “Buyer” and “Senior Buyer” will have access to this module. However, buyers can only receive goods for their orders whereas senior buyers can receive goods for all orders on the system.
-
The System Administrator can also set an excess tolerance for the goods received under Orders> Set Excess Tolerance as shown below:
Screen: II 
The tolerance can be set as a percentage or value as highlighted above. This would apply to each line item after an order has been issued. This feature is useful when receiving items such as meat. For example, a user issues a purchase order for 5 kgs of meat but receives 5.2 kgs. The user can increase the quantity to 5.2 to reflect the price accordingly (this is assuming the increase is within the tolerance level set by the SA).
-
The administrator can also decide whether an email needs to be sent to the originator and buyer of the order when items are booked in or when items and booked in and accepted under System Notification> Order Notification as shown below:
Screen: III 
-
Once these settings are done, you can log into the user section and see the Goods Received module on the left menu bar. This page will show you all the orders with the status Issued.
-
The main Order screen, once an order is issued, a user will be able to see a “Goods Receiving” tab on the left as shown on the screen below:
Screen: IV 
-
Since the system allows a 10% tolerance on goods received, you can increase the quantity of the line items by 10%. For e.g. you can increase the quantity of the USB keyboard to 2 or less as shown below:
Screen: V 
You will see that along with the quantity, the price has also increased automatically.
Note: The system will not allow you to increase it beyond 2 (beyond the set tolerance) and will give you an alert message -
The Event Log will reflect the details of this movement as shown below:
Screen: VI 
-
You can also reschedule when the items are to be received under Goods Received> Item Receipt> Reschedule as shown below:
Screen: VII 
On the below screen, you can add new dates for the items. To add one date for all the items, select the date from the calendar in the “Set All New Due Date To” and click on “Set All”. To add individual dates for items, select the date from the calendar in the “New Due Date” field. Click on “Update” when details are added or changed as shown below:
Screen: VIII 
Note: If you had entered a due date at the time of editing a line item, then that due date would show on the above screen under Due Date.
-
Once items are received, you can book them into the system by clicking on “Book-in Item” to see the below screens: To start with the book-in process click on “Book-in Item” to see the below screens:
Screen: IX 
-
The Book-in screen is shown below. You have the below options:
Screen: XI 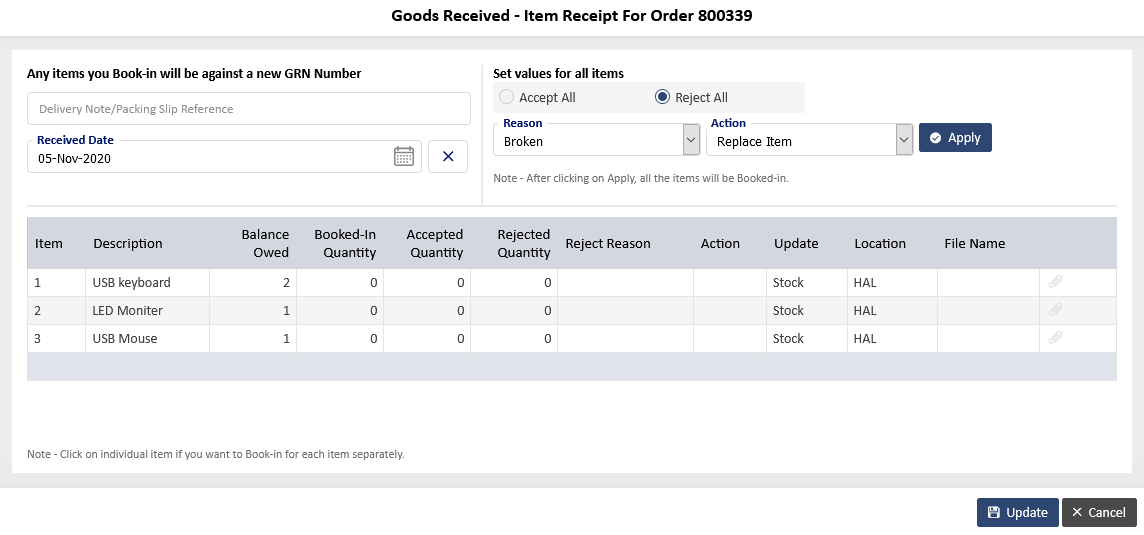
a. The first option is to accept all the items. To do so, click on “Accept All” and then on “Apply” and “Update” as shown below:
Screen: XII 
Screen: XIII 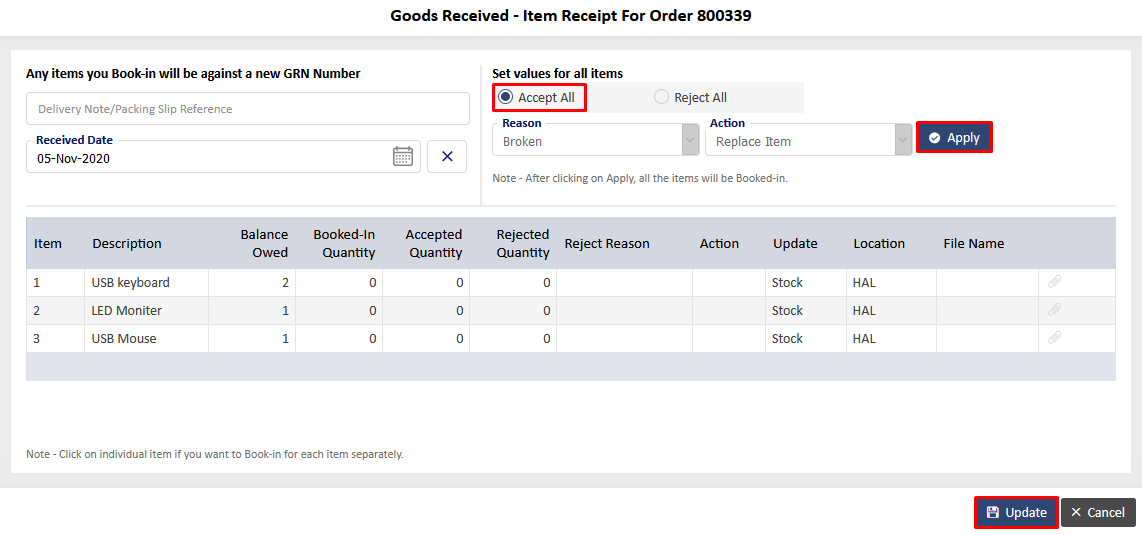
Note: The “Reason” and “Action” drop downs are disabled when you click on “Accept All”.
b. The second option is to reject all items. To do so, click on “Reject All” and select the relevant dropdown options and click on “Apply” and “Update” as shown below:
Screen: XIII 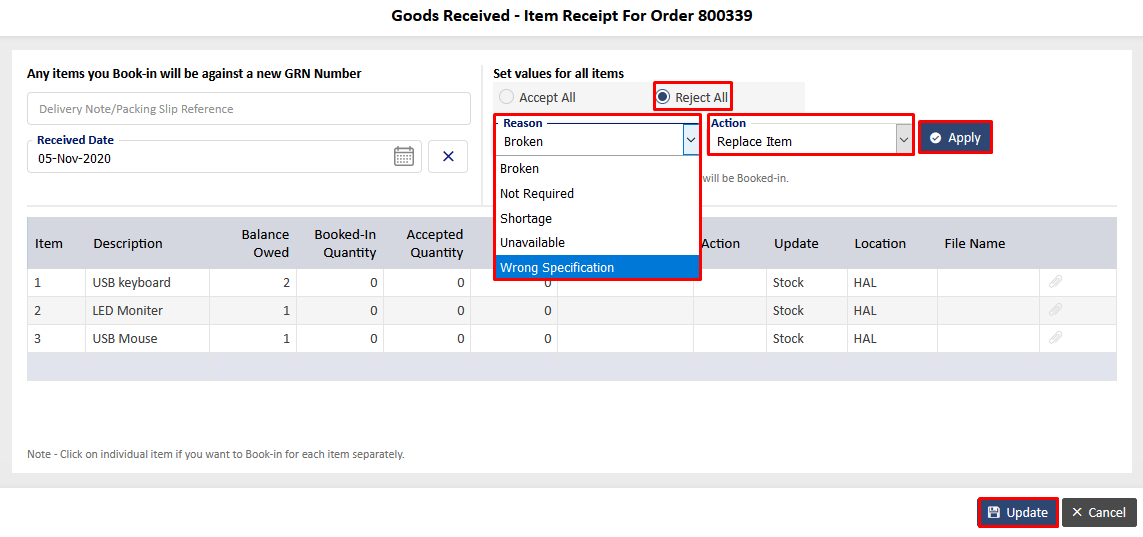
c. The third option is to accept/reject individual items. To do so, click on the item. You can book-in and accept as shown in the below screens:
Screen: XIV 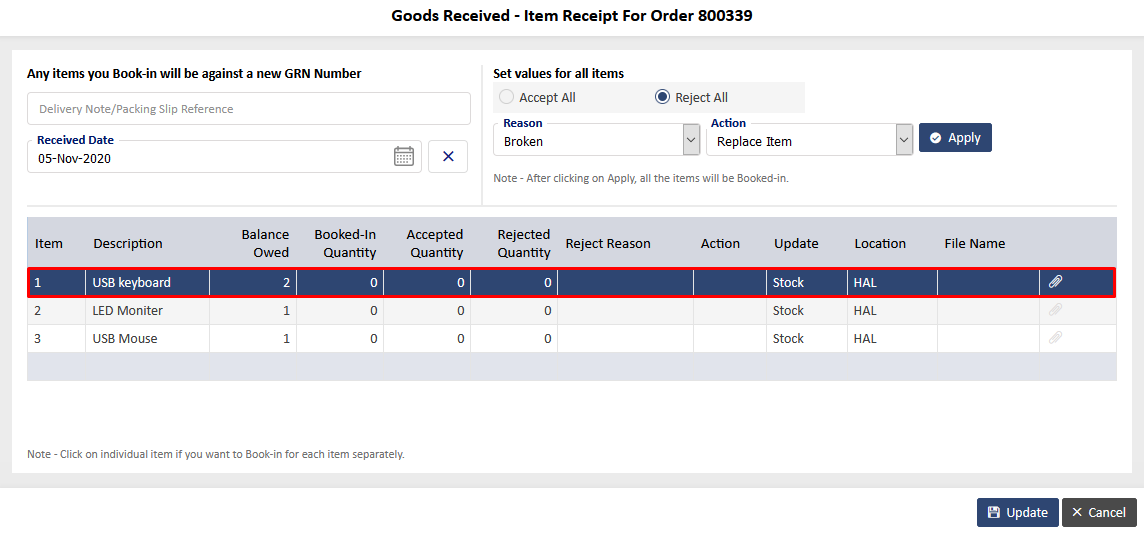
Screen: XV 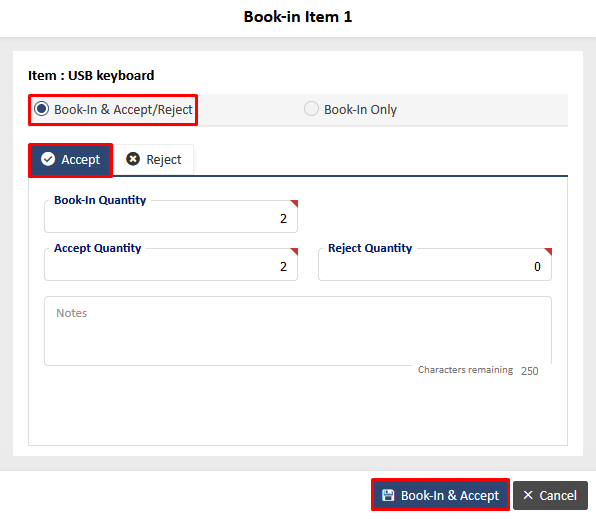
You will see the below screen once you have booked-in and accepted:
Screen: XVI 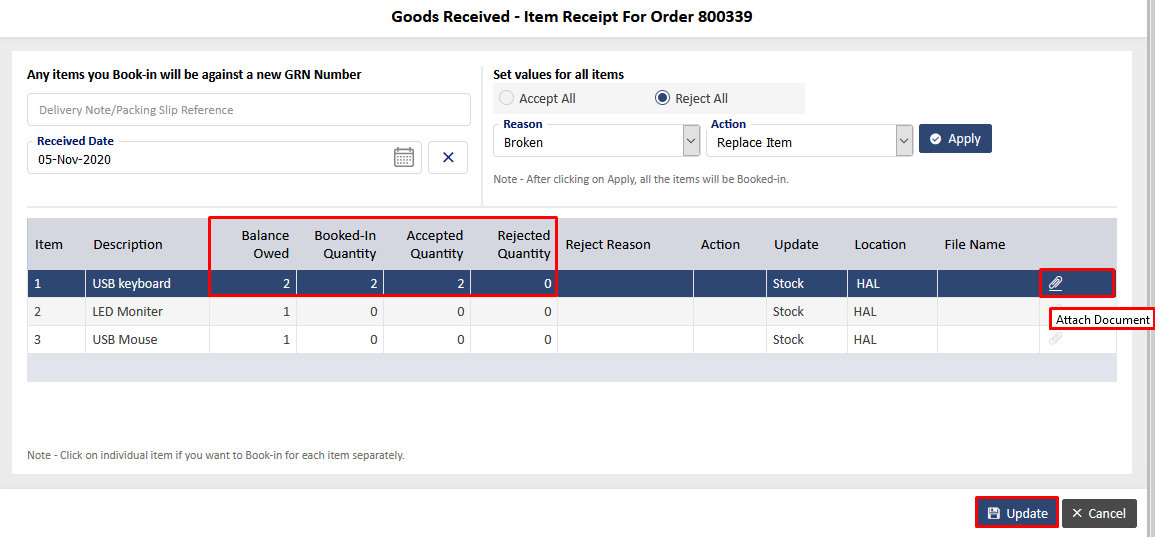
The Balance Owed, Book-In and Accept columns have the relevant data. Also note that the attach document icon that was disabled is now enabled. You can attach a delivery note/packing slip reference here.
d. The fourth option is to only book-in the items. To do so, click on “Book-In Only” to see the below screen:
Screen: XVII 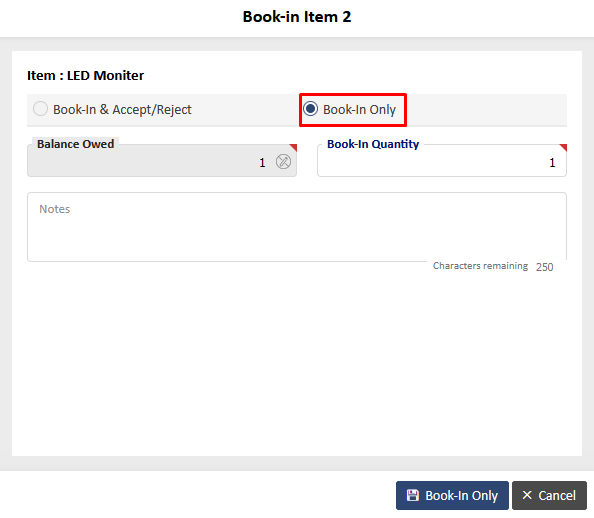
Add the details and click on the “Book-In Only” green button to see the details reflect as shown below:
Screen: XVIII 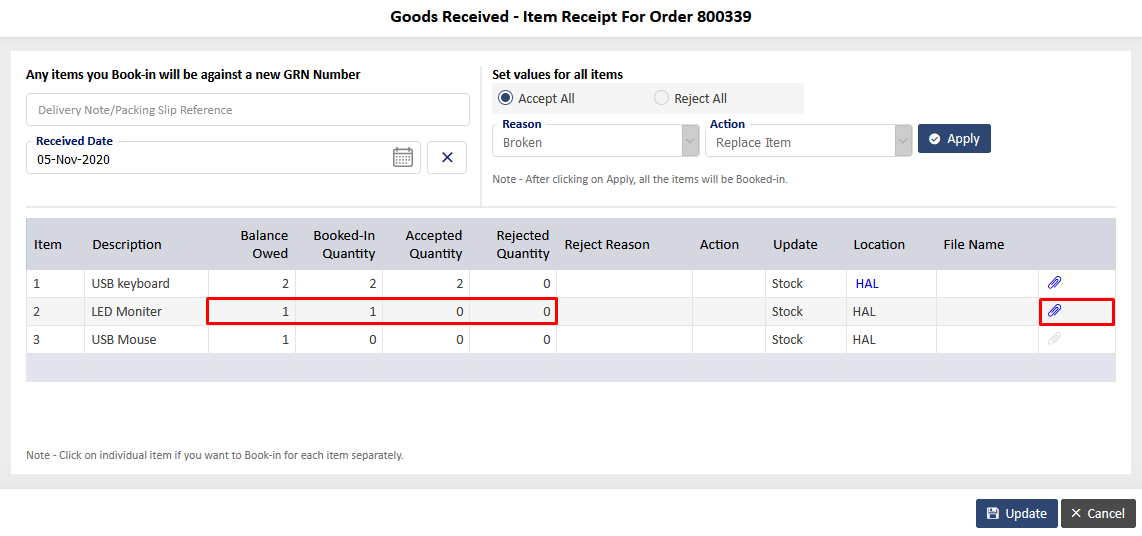
You will see the Balance Owed, Book-In and Accept columns reflect details accordingly.
You can also now attach documents. Since the SA had selected the option for an email to be sent to the Originator and Buyer when an item is booked in, you will receive the below email, To know more click here.Screen: XIX 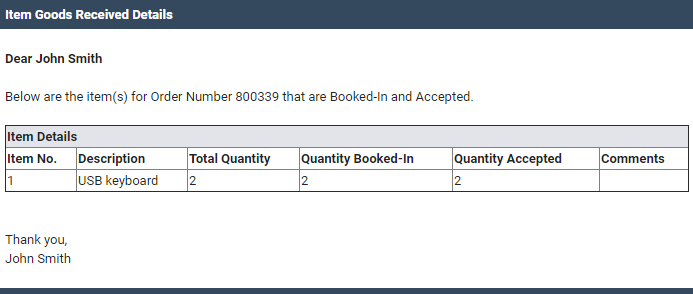
e. The last option is to reject an item. Click on the edit button of that item and navigate to the reject tab to see the below screen:
Screen: XX 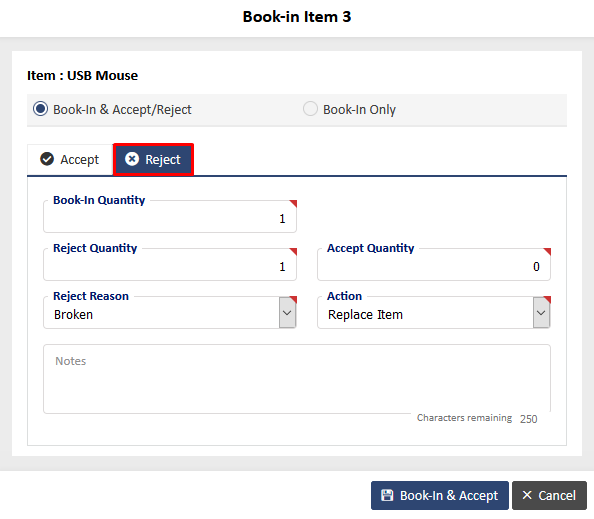
You can select the details from the relevant dropdown for “Reject Reason” and “Action”.
-
You can see the details of all the 3 items under Receiving> Item Receipt as shown below:
Screen: XXI 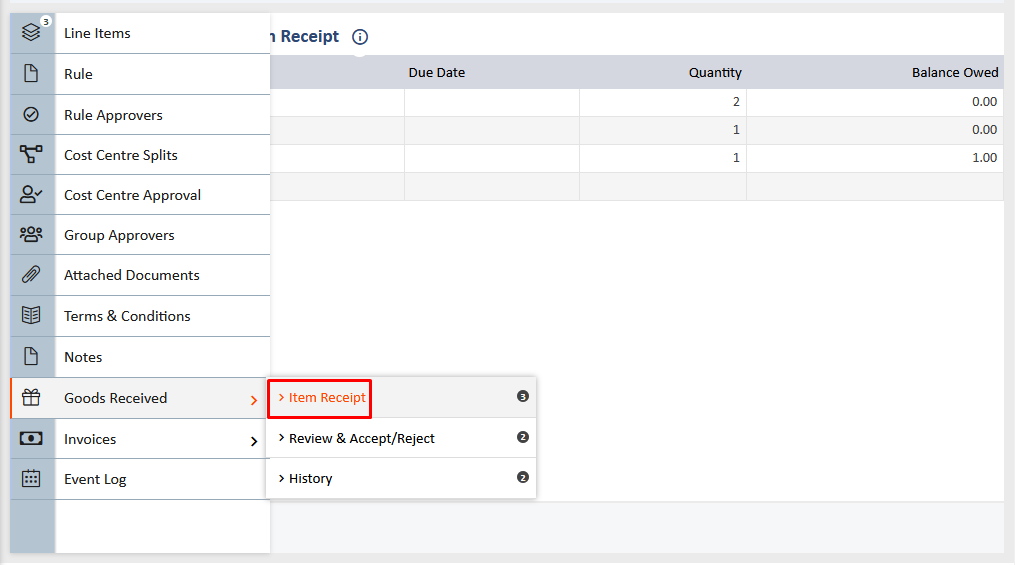
-
Under Goods Receiving> Review & Accept/Reject, you will see further details such as shown below:
Screen: XXII 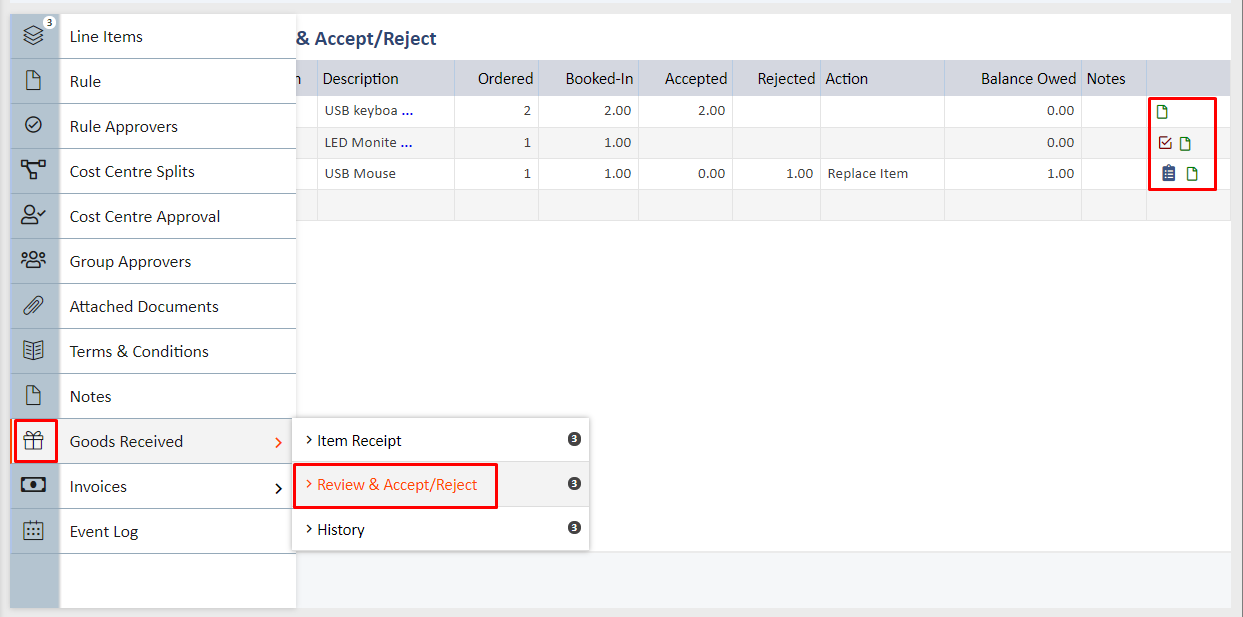
a. You will see that each of the 3 items has different icons next to them. The first item USB keyboard was Booked-In and Accepted which means that someone has checked what the supplier sent and has accepted the items.
b. The second item LED Moniter was only Booked-In which means that someone like a watchman security must have only taken the goods from the supplier. However, it has not yet been accepted by the Buyer. This would show an icon next to it allowing you to accept/reject the items as shown on the screens below:
-
When you click on the icon you will see below screen
Screen: XXIII 
Screen: XXIV 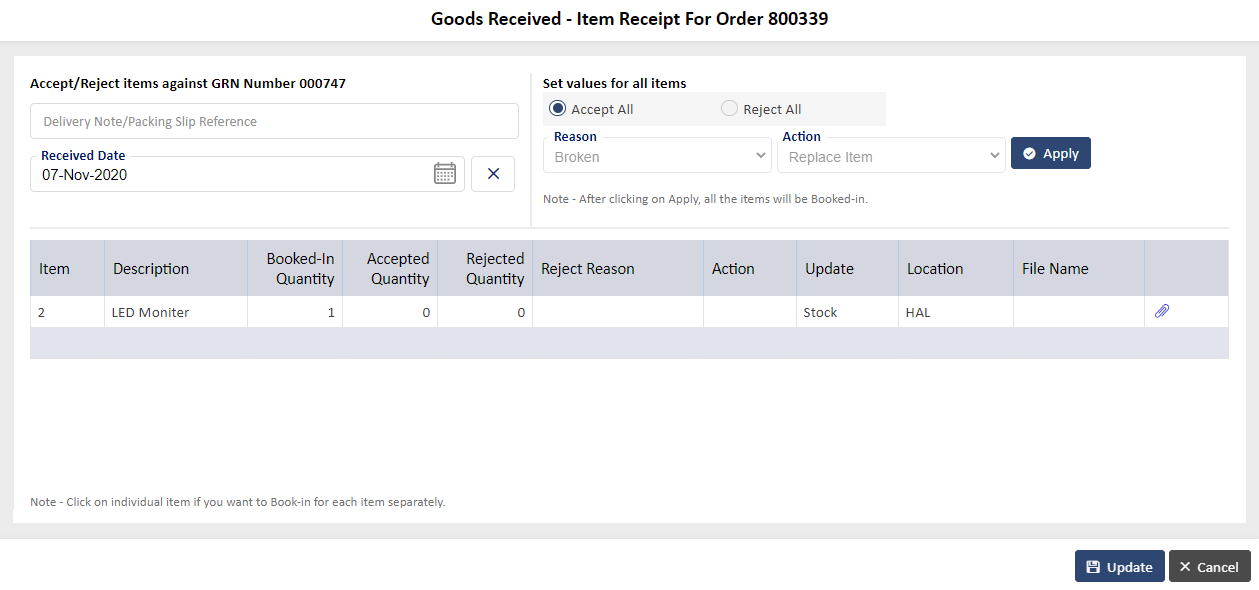
c. The third item Sea Salt was rejected and will show the Returns Note icon next to it as shown on the below screens:
Screen: XXV 
When you click on the icon you will see below screen
Screen: XXVI 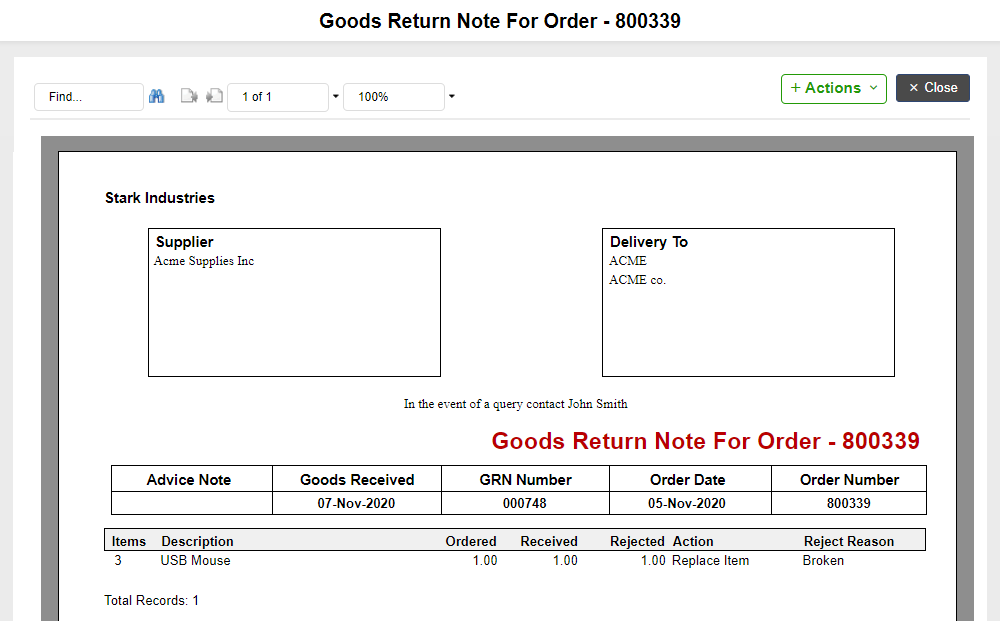
d. All 3 items will show the GR Notes as shown below:
Screen: XXVII 
-
Under Goods Receiving> History, you will see the details.
Screen: XXVIII 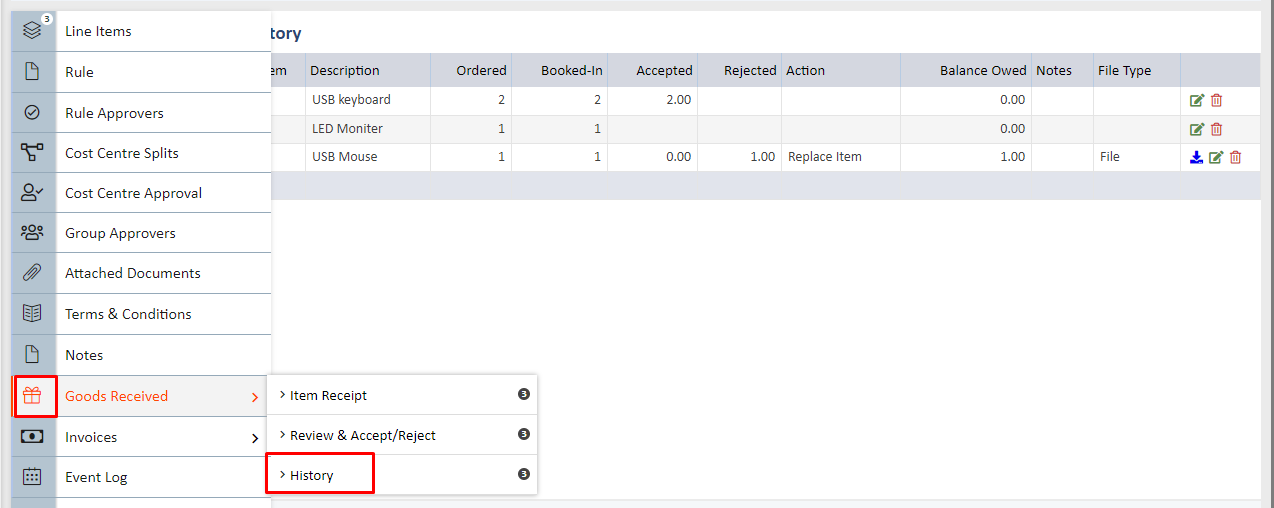
You can also see a preview by clicking on the highlighted “Preview” button as shown on the screens below:
Screen: XXIX 
Screen: XXX 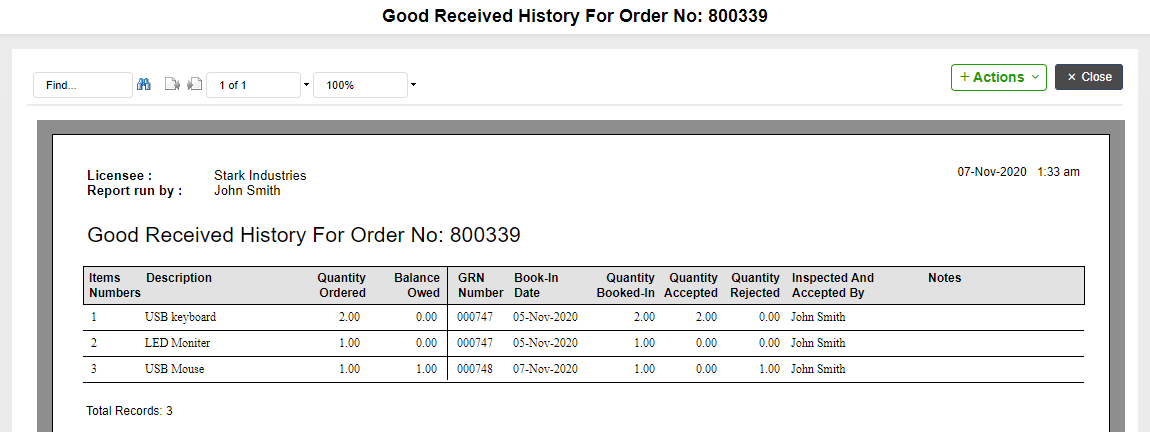
-
There are three options under Quick Links | Reports as shown below:
Screen: XXXI 
Goods Received listing Report - This report lists all the orders as per the headers on the Goods Received listing page.
Since you are a senior buyer, you can look at all the orders. However, the other user types will only be able to see their own orders.
